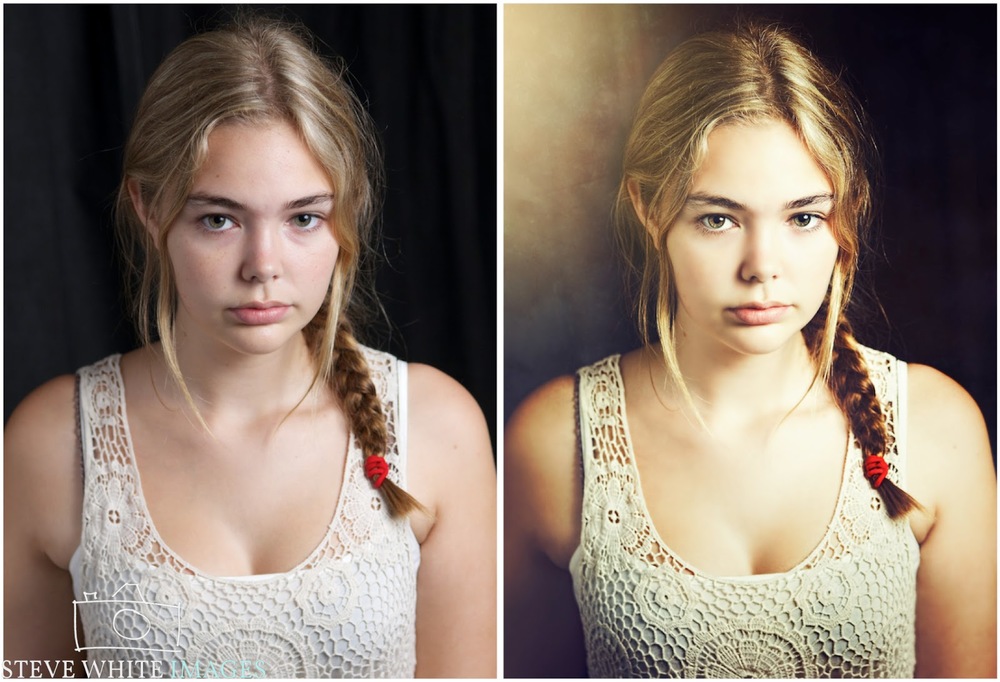
Thought I'd throw up a before and after shot and explain a little of my technique here. The before shot is fairly simple - single light set up with a reflector. But - it's nothing particularly amazing, I wanted to pep it up a little. Here are the steps I took with links to credit the software and action providers:
- Apply vignette in Aperture to darken the background a little.
- Curves adjustment layer in PS to further darken background while keeping the subject well lit
- Blemish removal with healing brush and patch tool
- Ran "Alison" action from www.fashionactions.com. One of my favorite actions at the moment - can do amazing things to spice up an image.
- Ran Topaz Detail from www.topazlabs.com to bring out detail in the eyes & top, making sure to mask out any skin areas.
- Ran Perfect Portrait 2 (free) from http://www.thecoffeeshopblog.com to smooth skin and further define eyes.
- Placed depression glass texture from http://jessicadrossintextures.blogspot.com.au/, masking out a bit of the face and painting texture out of skin and eyes etc.